
Earlier this month the popular free SSL service, Let’s Encrypt, started supporting Wildcard SSL certificates. This means you can now use a single certificate to support domain.com and secure.domain.com. The process to create a wildcard certificate is fairly easy, but required you to change your DNS settings. Let’s take a look at the process.
Installing Certbot
First, you need to install the latest version of certbot-auto (version 0.22.0 at time of writing). The easiest way to do this is:
Creating the Certificate
Once downloaded, you can use the command-line tool to manually create a wildcard certificate:
The certonly option means only the certificate will be generated, and no server changes will take place. The --manual flag is used to manually go though the verification process to issue the wildcard certificate.
Use the -d flags to set as many domains as you need in this certificate. In this example, we set two domains: domain.com and the wildcard *.domain.com.
The --server flag needs to be set with the URL (as above) so that the ACME v2 APIs are used in the creation process. ACME v1 APIs do not support wildcard certificates. If you don’t specify this URL, you will see an error like:
Wildcard domains are not supported: *.domain.com
Note: Once the ACME v2 APIs become the default for Certbot, the --server flag will no longer be required.
The Certbot will take you the setup process for the wildcard SSL. The process involves changing the DNS settings for your domain so Certbot can verify that you own the domain, and setting up a text file on your server as a second verification step. A screenshot of the process can be found below.
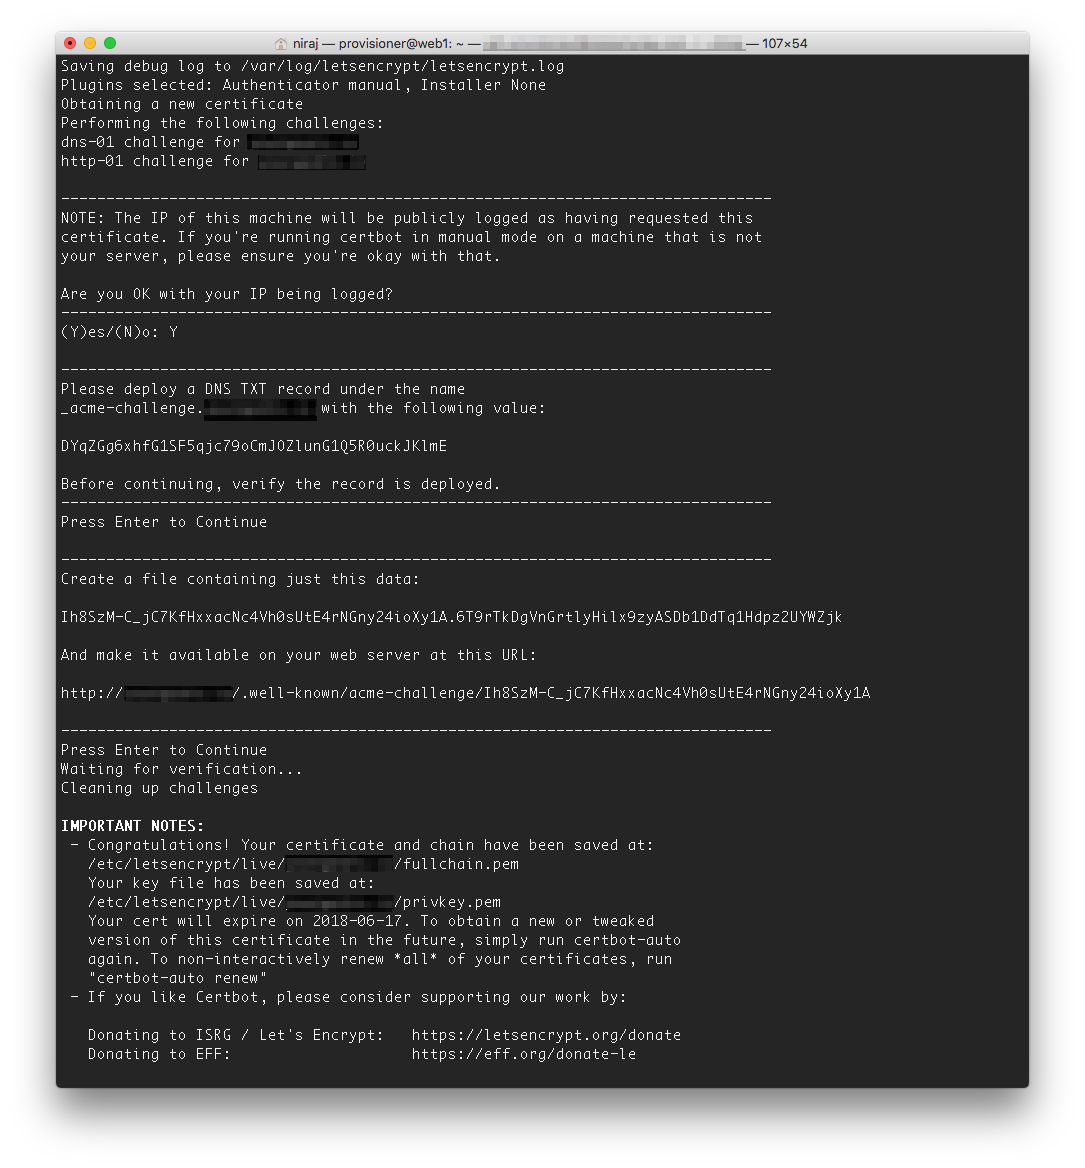
At the end of the process, the SSL certificate and Key will be setup in the folder: /etc/letsencrypt/live/domain.com/. The path will depend on the domain(s) you’ve setup. See the “IMPORTANT NOTES” part of the output after the certificate has been generated to confirm the paths (as per screenshot above).
You can then update your server config to point to the certificates. For example, on Apache, you can do:
Renewing the Certificates
Certbot lets you automatically renew your certificates when they expire. Since Let’s Encrypt certificates are only valid for 90 days, it’s good to have Certbot renew the certificates for you. To renew the wildcard certificate, you can use the command:
The --apache flag tells Certbot that you are using the Apache HTTP server on your system. But since we’re using the certonly option, the command will only generate new certificates and not update the apache config.
If you have multiple domains that use Let’s Encrypt, you can renew them all at the same time using the sudo ./certbot-auto renew command-line.
Note: The --dry-run flag does not currently work with the renew option. This is expected to be fixed in the next release of Certbot (v0.23.0). See the bug report here.
If you have any questions or issues, let me know if the comments section below.